What are LinkedIn ‘events’?
‘Events’ on LinkedIn are a way of promoting a conference, meet up or other ‘event’ you are holding either offline (one day maybe….) or online. The events don’t have to be held on the LinkedIn platform and don’t have to have anything at all to do with LinkedIn.
Very kindly LinkedIn just allow us the facility to organise and publicise our events via the platform – how nice of them!
Why would I use LinkedIn events?
Haha! Once you’ve read this article you will wonder why you would NOT use this service! Ok, here it is in a list – why you should use LinkedIn ‘events’:
- LinkedIn events are free!
- LinkedIn events are SO easy to set up! (See below)
- You can add an external link to either a landing page to, say, get the link or to a ticketing website for people to buy tickets
- You can invite your whole contact list really easily and quickly (See below)
- You can post a LinkedIn event from your personal profile OR your business page
Read: 5 LinkedIn content ideas to stop you stressing
OK, so now the ‘how’ to set up LinkedIn events?
- Go to your ‘home’ page
- Scroll down the left menu until you get to events
- Click the ‘+’ sign
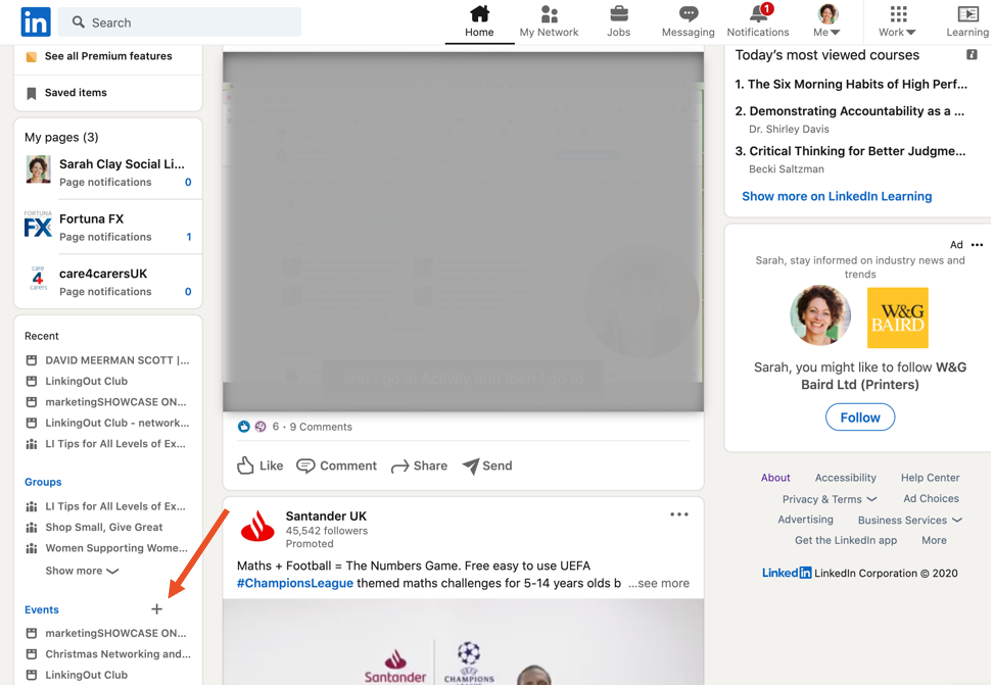
- From the pop up, choose which account you want the event to be publicised by
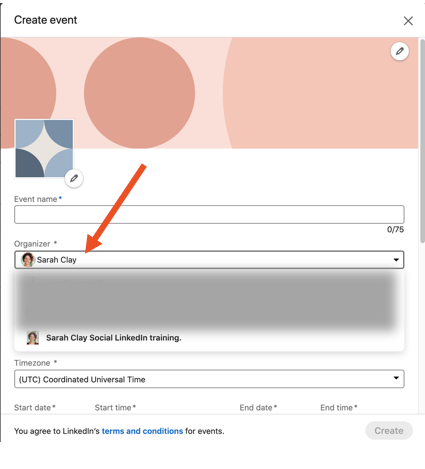
- Complete the other fields – you can edit this afterwards but it’s best to get it right first time then you can start sending it out.
You’ll need to complete:
- Timezone
- Start and finish time
- Date(s)
- Description
- Try to be as full as possible here to save people having to ask you questions.
- Speakers
- They’ll automatically be invited when you create the event
- Link to external website.
- Here you can add the url to your ticketing website or a link to a landing page you’ve created with more information and the link to join the meeting. Using a landing page means you could potentially use the event to collect emails – always a good thing!
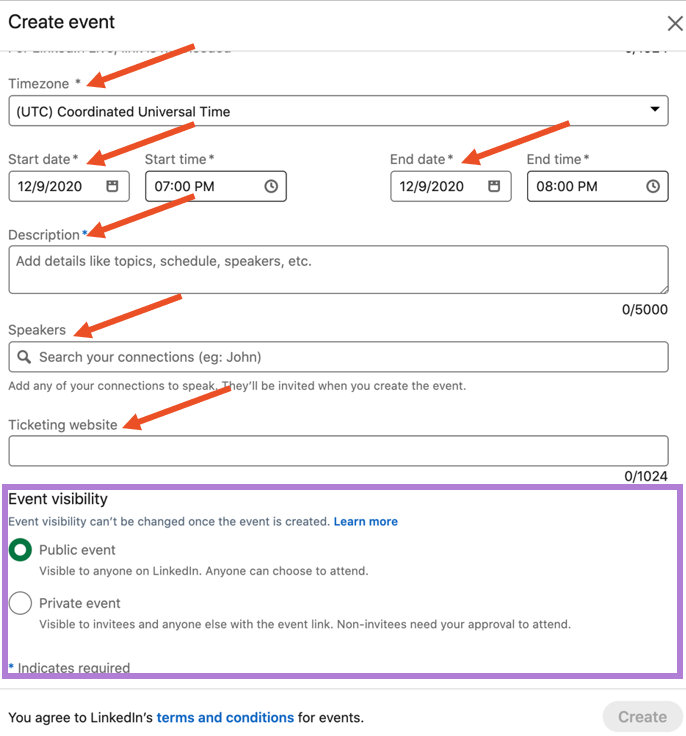
Please note re: ‘event visibility’ – this is one thing that can NOT be changed once you’ve created the event so make sure you choose the right one!
- Add a profile photo and a banner
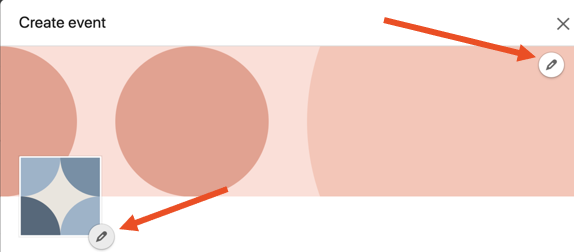
The photo could be of you or it could be a logo you have created specifically for the event. It is a square frame.
The banner could be something you have created in, say Canva or photoshop or it could be a photo. Format is 4:1. Make sure you don’t misshape or ‘squash’ any images.
- Click the ‘create’ button at the bottom and BOOM! Your event is created! You will now be directed to the event page.
You can edit the event details once it’s published although NOT the event type and not after the event has started so try to get it all straight before you publish. But, if you must:
How to edit Event details after publishing
- Access the Event page under the Events section in the left rail of your homepage.
- Click Manage event on the top right corner of the Event page.
- Select Edit event
- Make the required changes in the Edit event page
- Click Save.
Note: Your attendees will receive notifications if you’ve changed the location or time, so my advice is to try not to make changes as it will just create more hassle and aggravation for them.
‘Manage attendees’ shows all the folk who you’ve invited to attend.
How to invite connections to your LinkedIn event
This is where the magic happens!
When you invite someone to attend your event, they get a notification in their inbox saying “*** has invited you to **name of event** and then a clickable link for them to say they want to attend. It’s SO simple! What’s more, you can invite people with a simple ‘click’.
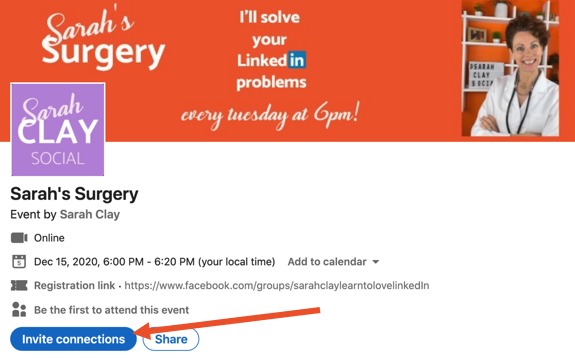
- Below the banner on the event page click on ‘invite connections’
Up will come a list of all your connections! You can even filter them by industry, name, geography…. The possibilities are many! Can you tell I love this feature?
- All you have to do is click on the square by the name of the person you want to invite and click ‘invite’ in the bottom right corner!
AND
You can invite up to 50 connections at a time!!! This is GOLD DUST!
Or is it?
What you need to be very careful of is that you don’t start to get all spammy and invite people just as a way of getting into their inbox. That, my friend, will only get you enemies, not friends.
So choose verrry carefully from your connections only those folk who you think would be genuinely interested in attending your event.
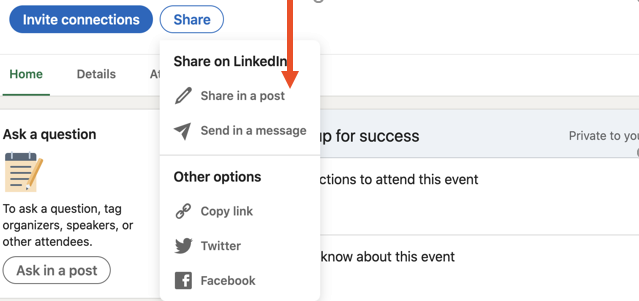
YOU CAN ALSO SHARE THE EVENT IN OTHER PLACES!
See in the photo above the ‘share’ button:
Again, my advice is to proceed with caution and thought. Don’t annoy people by inviting them to your event if you don’t think they’d really be interested in attending.
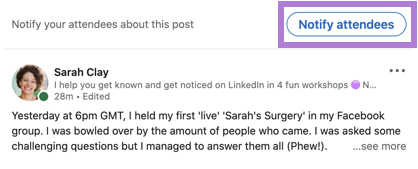
YOU CAN START A CONVERSATION IN THE EVENT ITSELF TO START CREATING A ‘BUZZ’ AROUND IT
Just start creating a post in the normal way. You can add videos, images, polls, hashtags as a normal post. It will show up in your feed along with your posts.

So what’s the difference between this post and a ‘normal’ post?
You can notify all the attendees about your post when you have created it:
So, there you have it my lovely LinkedIn learners – all you need to know about creating events in LinkedIn!
If you’ve gleaned any new information from my article at all – please do two things if you haven’t done them already:
- Subscribe to my newsletter! You’ll get all my tips and tricks straight in your inbox! (see the form below).
- Come and join my free Facebook group ‘Learn To Love Linked In’ – you can attend my weekly event if you do that!
Thank you and see you soon!